The best looking buttons for the Scenes of your Smart Home
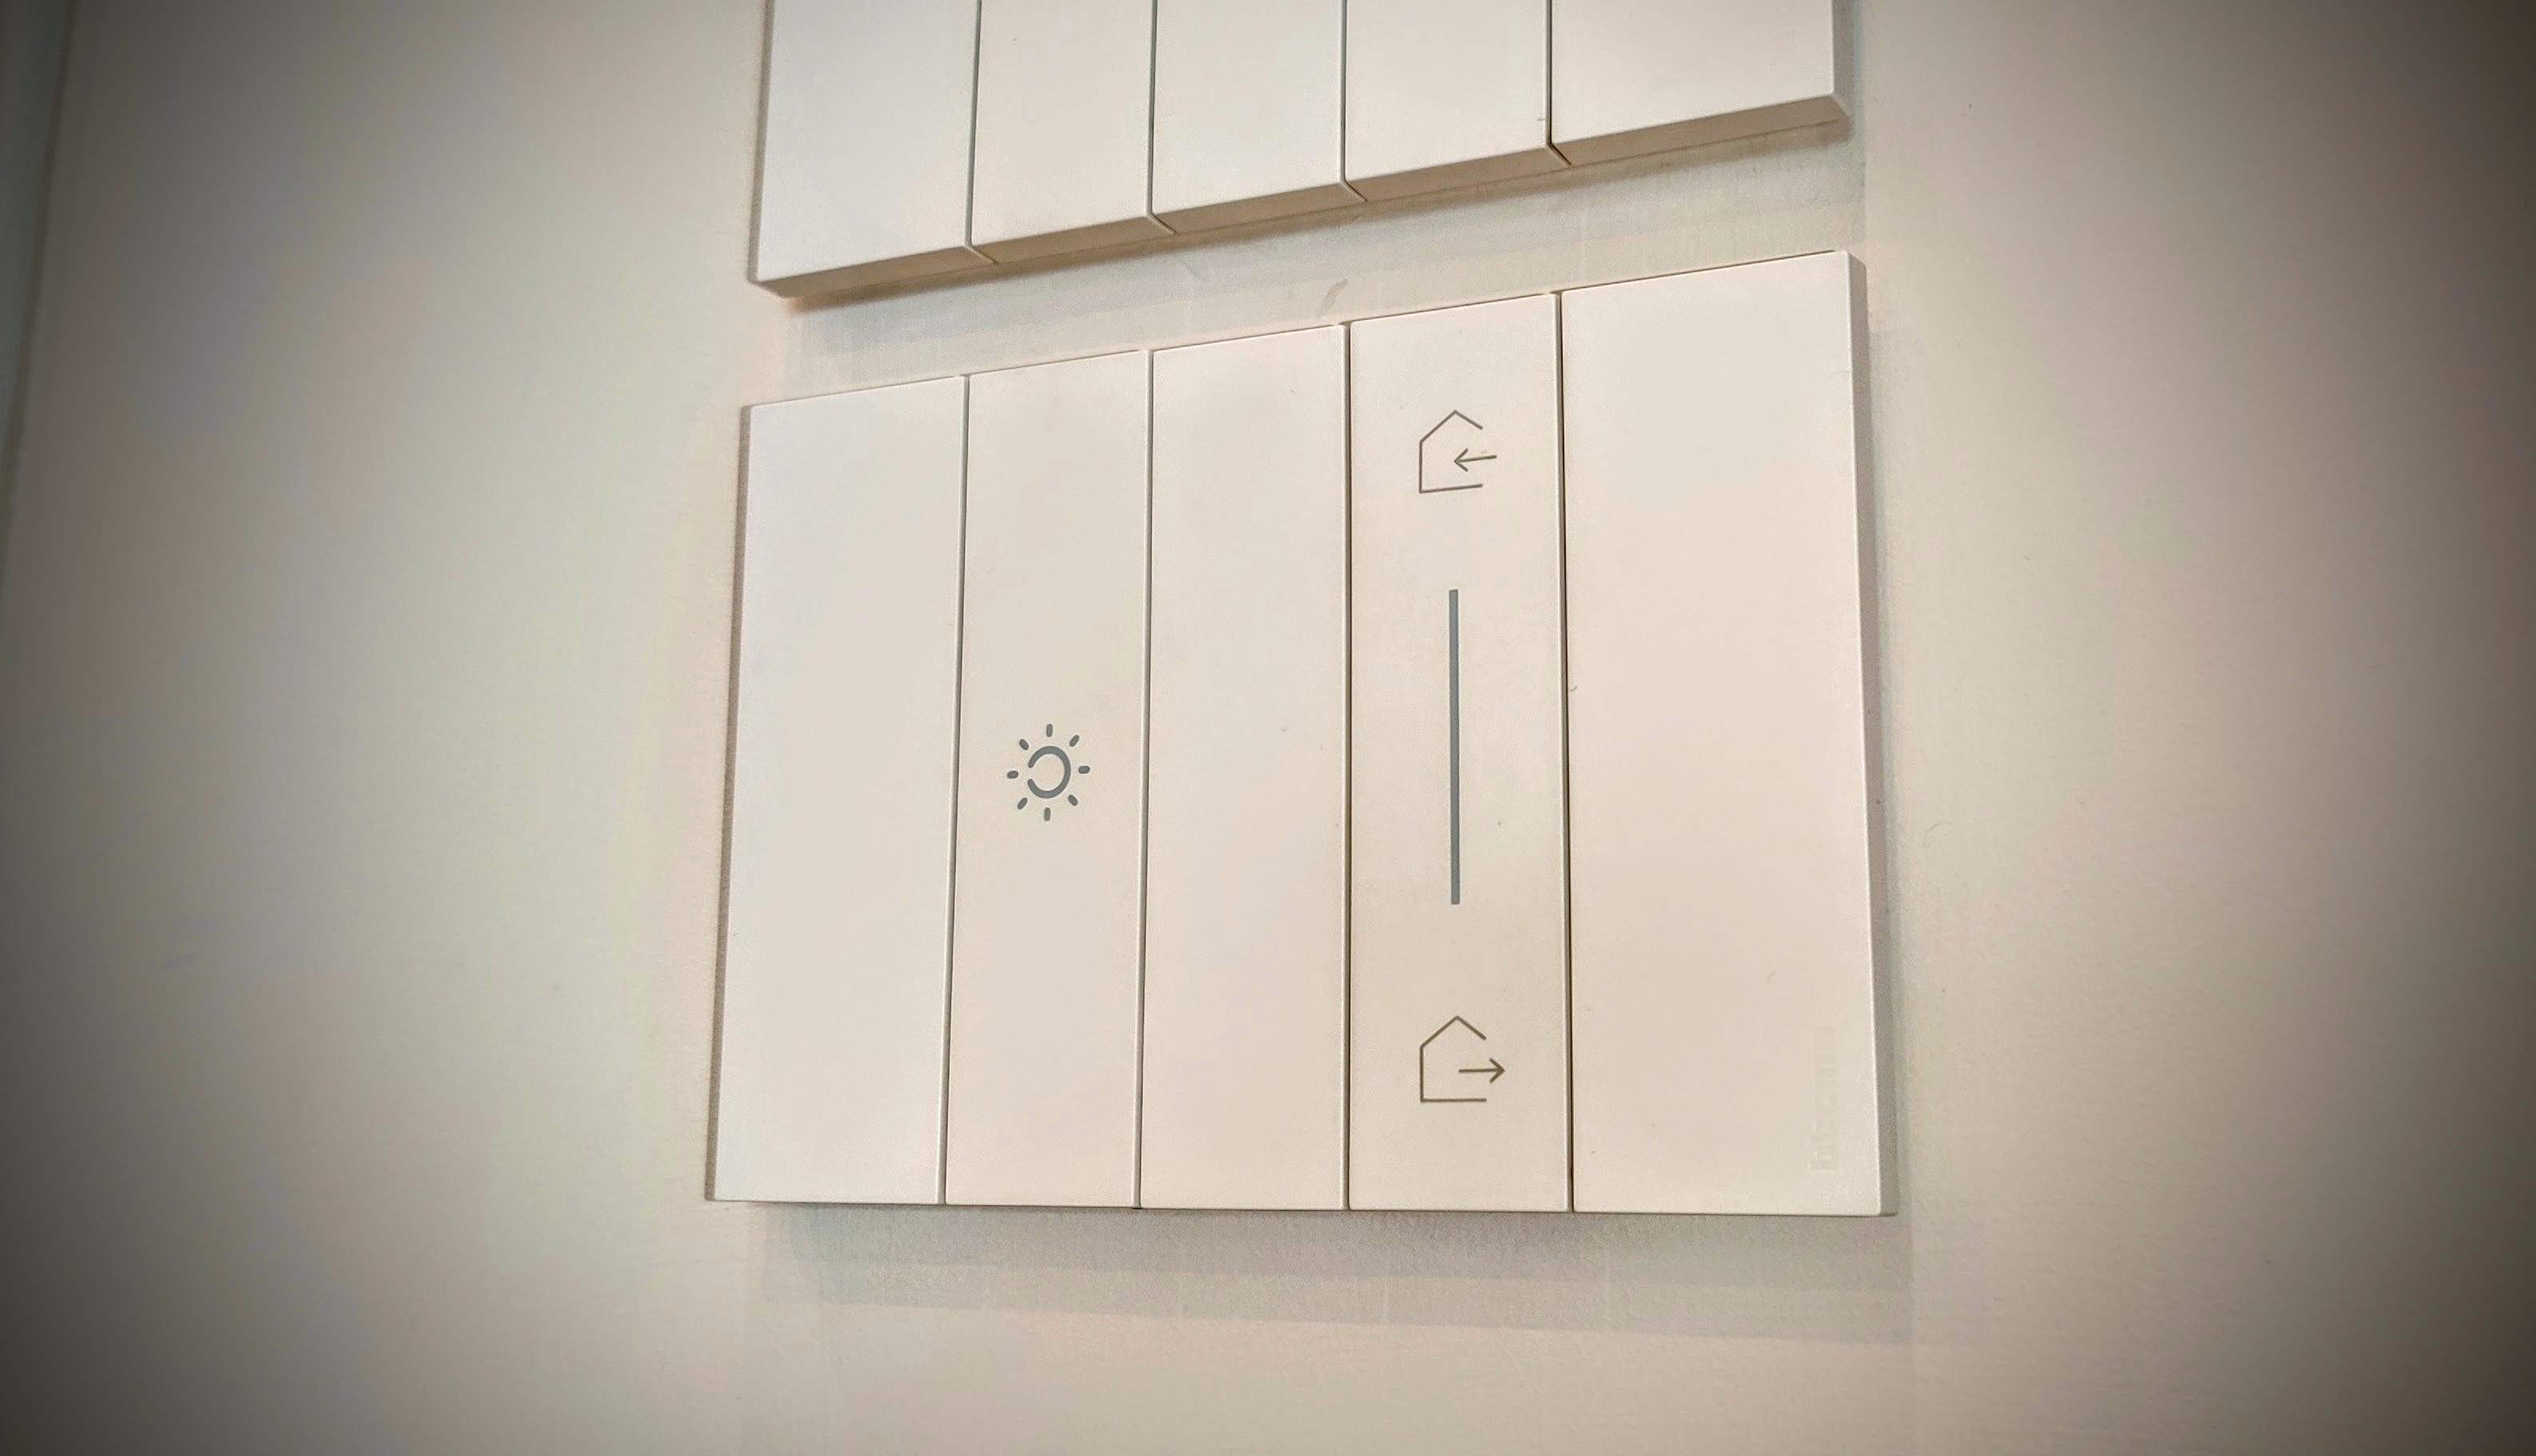
Scenes in your Smart Home
The smart home aims to simplify and improve the experience of those who occupy it by means of a system of technologies and components. The scenario, understood as a set of pre-set actions and commands to be performed for a purpose, is its maximum expression. The most famous are those linked to the entry/exit of the house and to the alternation of the occupants' moments of wakefulness and rest.
How to approach
Theoretically, every scenario could need to interact with any home device, perhaps interacting with the shutters, the lights, the external weather services, the alarm or video surveillance system, the TV, the speakers… On the other hand, many manufacturers themselves offer push-button panels of pre-set scenarios or automatisms, often with the support of apps that are not always open to third party elements, sufficiently configurable or stable over time.
The most flexible solution remains that of managing the home through a centralized hub, installed locally, capable of interconnecting with any technology and/or device. For this reason I have avoided all closed and ready-to-use solutions, preferring to have full control of the system and a fair cost savings on the components.
Manual activation
Although for some scenarios it is possible to think of using them as automatisms when certain predetermined conditions are triggered, such as the time, it is not a good practice not to provide for manual activation by the user. Through integrations with voice assistants such as Alexa and Google Assistant, you can also use your voice to do so, but sometimes the greatest convenience will be simply pressing a special button, in the right place at home.
After putting the kids to sleep, wouldn’t you rather click a silent button to activate the night scene instead of talking to the voice assistant?
Components
- Shelly I3 (now replaced with Shelly Plus i4: Site of Shelly) for every pair of scenes (like day/night);
- Double Button not-interblocked Bticino Living Now 10A K4036 (or K4037, double button interblocked)
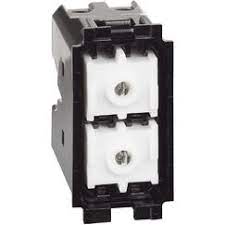
- Wall support (in my case: Bticino K4703)
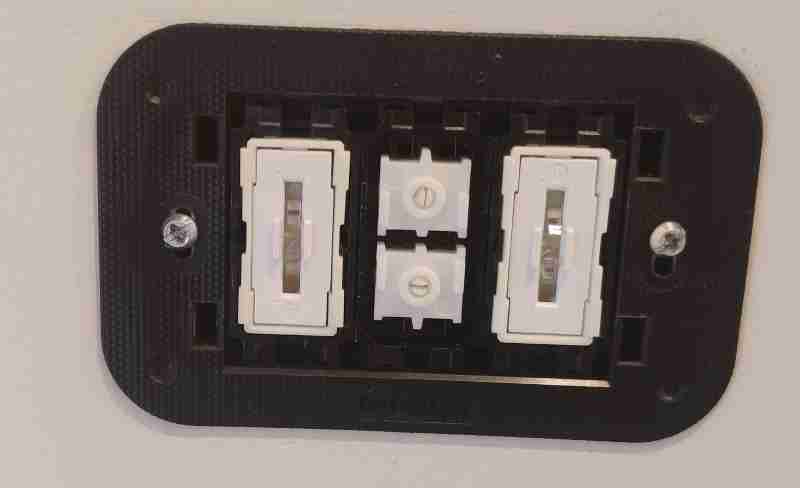
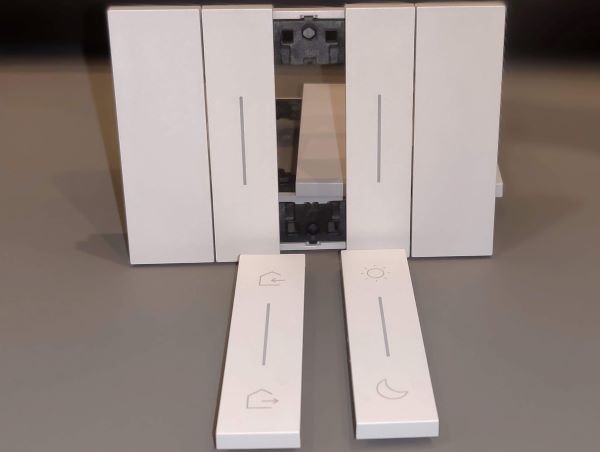
- Cover Bticino Living Now Bianca KW40 for scene In/Out
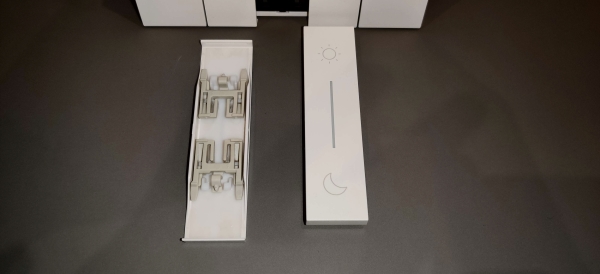
- Cover Bticino Living Now Bianca KW41 for scene Day/Night
- Local deploy of Openhab Server (take a look at my tutorial).
The choice between HomeAssistant and Openhab is personal, the potential is unlimited for both. This installation can be easily replicated in HomeAssistant environment.
Wiring and Configuration
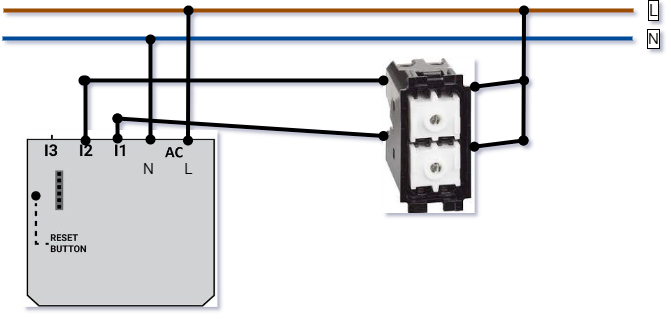
The 2 Shelly I3s were placed in junction boxes of a suitable size and the wiring relating to the button was sent to the box which houses the 503.
Contact 1 and 2 of the Shelly I3 has been connected to the Bticino double button.
Once wired, the button can be inserted in the basket and the cover with the desired symbol can be mounted:
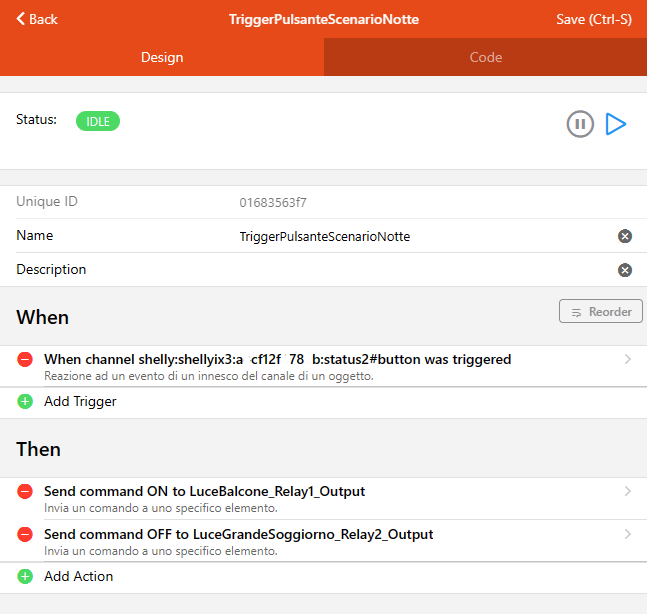
Once the Shelly has been configured on the network, it is possible to connect it to Openhab via the extension of the same name and add it as a “thing”. At this point all you need is to configure the “rule” to activate an automation.
Here’s an example:
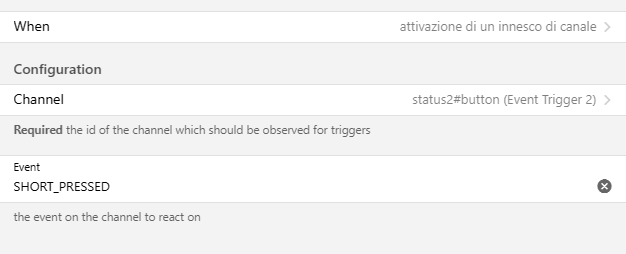
Different scenarios or behaviors can be activated based on the type of event:
| Event Type | Description |
|---|---|
| SHORT_PRESSED | The button was pressed once for a short time |
| DOUBLE_PRESSED | The button was pressed twice with short delay |
| TRIPLE_PRESSED | The button was pressed three times with short delay |
| LONG_PRESSED | The button was pressed for a longer time |
| SHORT_LONG_PRESSED | A short followed by a long button push |
| LONG_SHORT_PRESSE | D A long followed by a short button push |
If you do not use MQTT it is important to activate the CoIoT protocol within the settings of the single device on Openhab. Furthermore, it may happen that CoIoT-type communication requires configuration in the shelly of the IP address of the local Openhab server to communicate the triggers. The configuration is not available from the app, but only from the Shelly’s local url page on Internet & Security -> Advanced Settings -> CoIoT peer:IP_of_openhab:5683
Elegance and flexibility

The approach followed, while requiring some extra work, has its advantages:
- The plates are beautiful, integrated into the home system and not at all invasive from an aesthetic point of view;
- The solution is not as expensive as for the purchase of integrated smart wifi plates;
- The chosen components can be replaced individually, avoiding being the victim of a possible abandonment to updates by the manufacturer;
- In the event of electrical faults, any electrician is absolutely able to diagnose the problem, given that the bus approach or other architectural modifications of the electrical system have not been opted for;
- In the event of a digital failure due to the home automation platform, you will have access to timely logs, relying on the valuable advice of a large community (on HomeAssistant it is even larger);
- Using a central hub, the scenario can impact any of the devices I have at home.
Alerts
Although Shelly appliances are safe and certified to operate in domestic electrical systems according to current European standards, it is always necessary to have these maintenance operations carried out by professionals. Opening junction boxes, disassembling and replacing components and disconnecting cables can be dangerous and prudent behavior is encouraged. Before working on the electrical system, make sure you have cut off the power. Never trust the color of the cables, always check again using a multimeter tester or phase finder.